i often get asked by new photographers & friends “how are your photos always so bright and crisp-looking? i try all kinds of things but no matter what i do, they don’t look like yours”

at the risk of looking like i’m jumping on the ‘before and after’ blog bandwagon: here’s a short ‘before and after’ post 😀 which i hope will go some way to dispelling the mystery.
first of all, i don’t think you should be trying to make your photos look just like mine. they need to look like YOURS – your own style and unique eye is what you bring to photography that no one else has, so make the most of it. as international wedding photographer jasmine star says: “don’t be the best, be different.”
regarding photographic gear: there are two schools of thought as to how much influence your camera equipment has over the end result. on the one hand, better tools are always easier to work with, have fewer limitations, and usually output a finer quality product. but on the other hand, a talented and experienced photographer can get stunning results with the most basic or old-fashioned gear – so the jury is out. generally, better quality optics, finer sensors/better film and more reliable focus systems/techniques will help most people improve their work – but that’s not all there is to it. your best tool is still your eye – so don’t turn your camera into your excuse!
i would love to claim that i’m so ‘rockstar’ that every photo i show here on this blog just fell out of my camera looking that way – sadly that is not the case, haha; each finished picture is the product of a good base photograph, and knowing how to use my processing tools to bring out my vision. everyone sees a different picture in their mind when shooting – and this is why it is important for you to be clear about what you want to achieve before you start, because that will guide you as you shoot and prepare the photo.
my processing tools:
adobe lightroom, which is my RAW file processor. i never shoot JPEG anymore, RAW allows for so much more creativity without damaging the photo. it is also very forgiving: should anything be not quite right when the shutter opens, it is good to know you have a better chance of recovering that shot!
adobe photoshop, my ‘finisher’. lightroom plays more of a lead role these days in my photo processing but i still rely on photoshop to work with the processed file, tweaking or adding special touches not yet available in lightroom. i also use it to prepare files for web viewing in order that they look their best.
i also have a collection of professional presets & filters for both lightroom and photoshop, which i use to save time while processing, or to give me a starting point for the result i want to reach. some i have created myself based on my own style; some have been shared by photographer friends of mine; and others are commercially available, such as Totally Rad Actions, Kubota Image Tools and Nik Software.
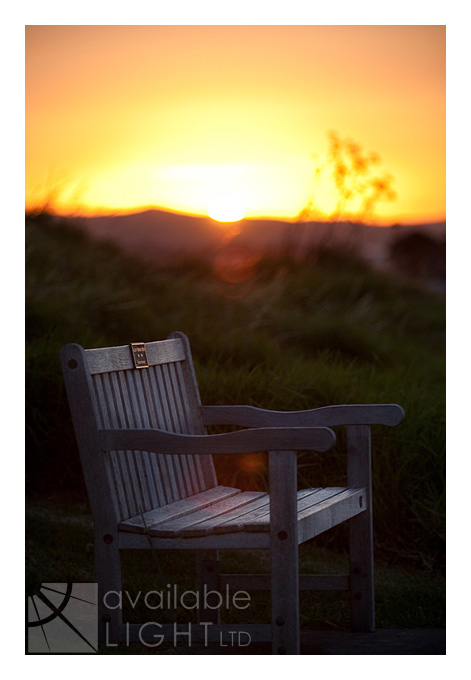
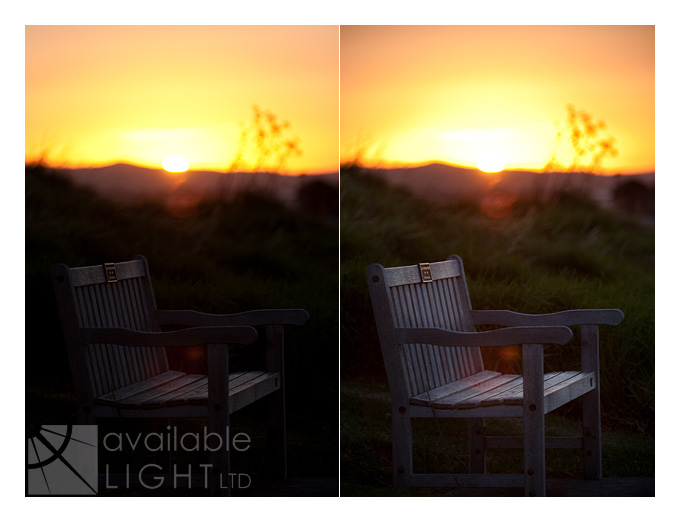
here is a photo i took yesterday on a photowalk, original is on the left; finished photo on the right:

the process:
* in-camera settings were: ISO 160, aperture f/2.8, shutter 1/1000 sec, focal length 135mm
i deliberately underexposed the shot to retain all the colour and detail in the sky
* using lightroom 2, i chose a feathered adjustment brush and set the exposure to +0.5, then painted over the seat and surrounding grass to lift it from the shadows
* then, i chose the vignette tool and gave the edge of the photo a slight burn, which draws the eye toward the middle
* then i chose the brush again and set it to +0.3, and repainted the lighter areas of the seat to give more contrast
* then i exported the file and opened it in photoshop
* i chose a filter by nik called viveza which allows you to select a colour in the photo and alter it without changing the rest of the image
* i selected the seat colour, and cooled it down slightly by removing warmth and tinting it blue, to ‘place’ it visually back into the shadow area
* then i resized the photo, and added a slight sharpening effect and frame/watermark before exporting it for web viewing at 80% quality
and that’s it – not a lot was involved, but that’s because my original photo already was close to what i saw in my head. and that’s probably the most important tip of all.
any questions, feel free to ask 🙂


Great tips. Thanks for posting, and btw i love before and after especially with step by step process and why you did what you did. Makes it very helpful.:)